Wednesday, November 23, 2011

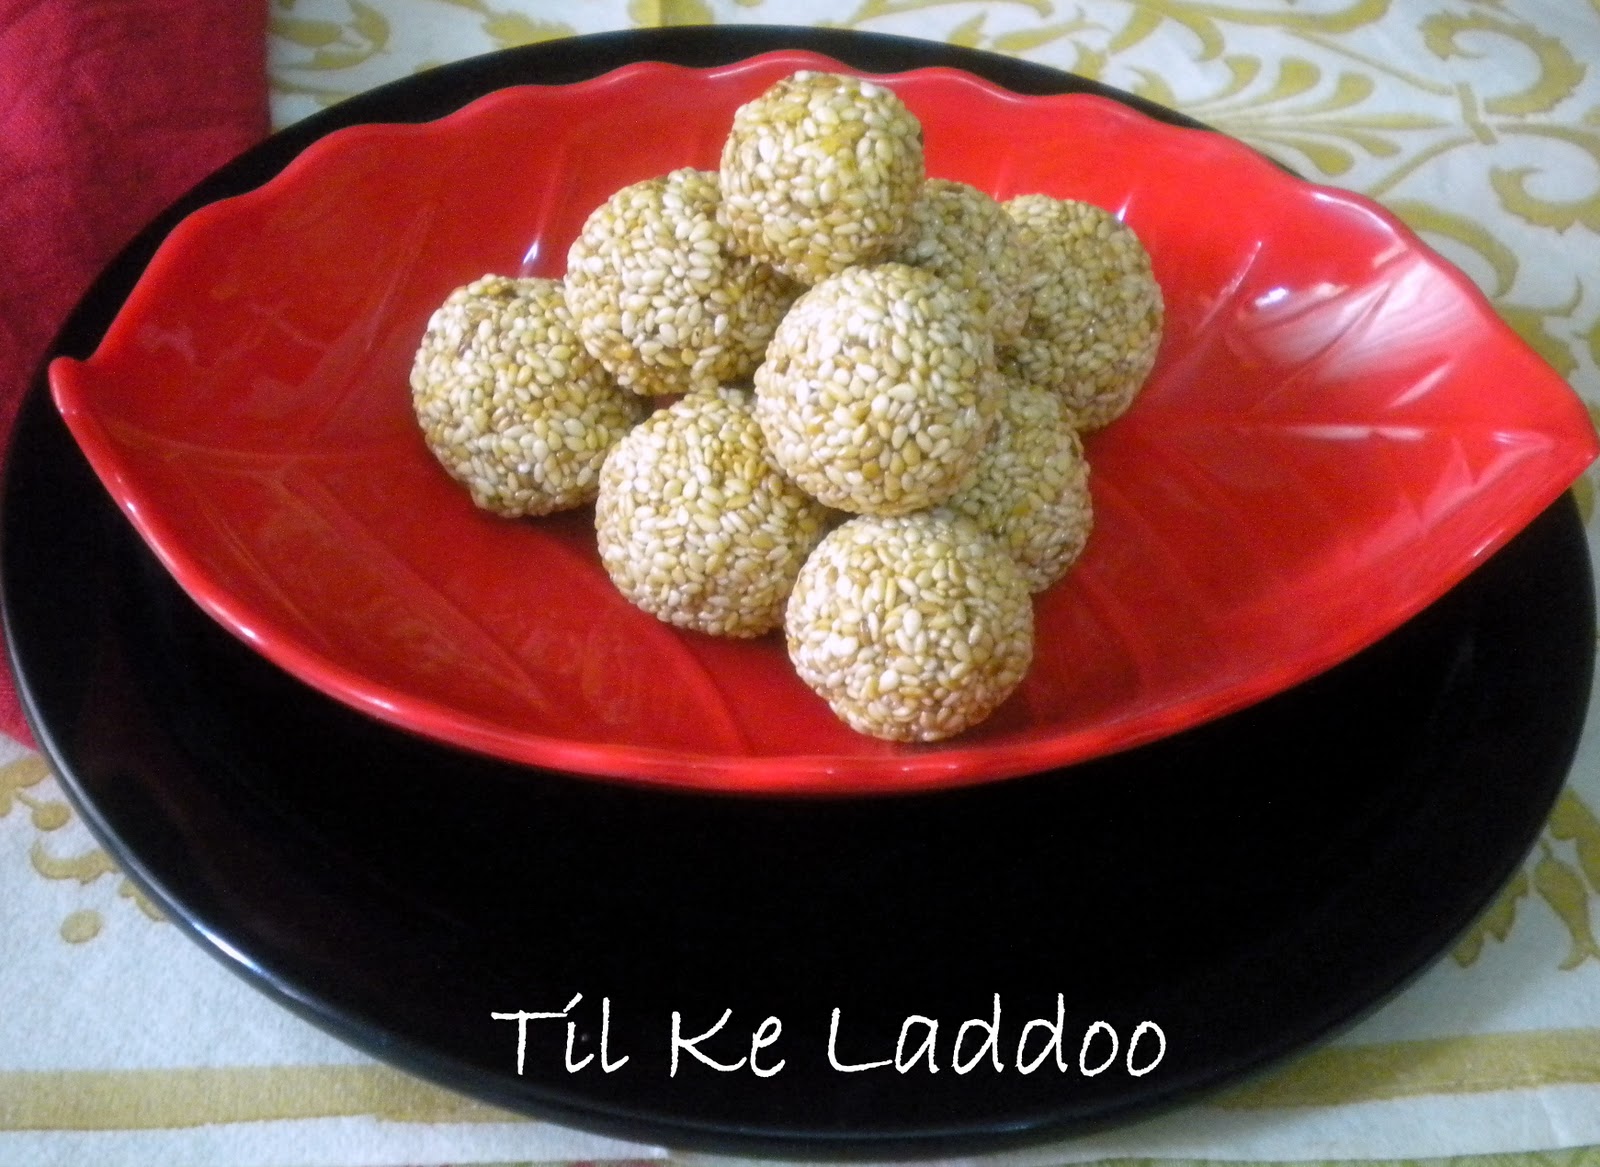
Til Ke Laddoo/Ellu Urundai


Having lived in Chennai for most of my life, I never knew what winter was like. Then one fine day, my father got transferred to a place called Ghaziabad near Delhi. I and my brother were very excited to be going to some city in the Northern part of India. We lived there for around 3 years and it was during this time that I actually came to know how it feels in winters.

I used to always envy my cousins living in Delhi for their winter uniforms: Smart woollen skirts or tunics with belt and tie, Sweaters and the best part blazers. So finally, I got to wear the the blazer. We used to leave home by about 6: 45 am and at that time, it would be quite dark outside, freezing and so much of mist and fog. On certain mornings we just did not feel like getting out of the warmth of our cosy razai. But still I love it rather than the sweltering heat. By around 5 pm it would start getting dark, the days were too short and nights very long. I long for those wintry nights. 

Come winter, and you could see loads and loads of the freshes vegetables like the Red Carrots, Raddishes, Turnips, Cauliflowers, Green Peas, Methi Leaves, Spinach etc. It was a norm in most houses to cook with these seasonal veggies. Dishes like Mooli Ka Paratha, Gobhi Ka Paratha, Gajar Ka Halwar, Makki ki Roti/ Sarson Ka Saag (recipes will follow) are few of the most common recipes that were dished out. My mom learnt a lot of recipes there, which we still continue to make.

Basically, winters are times when one loves to relax, laze around, enjoy a hearty meal and have a good night’s sleep. So this is exactly what I and my brother did when we lived Ghaziabad. 

Til ka Laddoo is a popular sweet in North India, generally made during winters especially for Sankranthi. Til and jaggery are said to keep the body warm from within. During winters, the markets in North India are flooded with different varieties of sweets made out of til like Gajak, revadi, etc. These healthy laddoos can be enjoyed as a dessert or as a healthy snack. So here is a simple recipe to keep you warm this winter:


What you’ll need

1.       White Til/Sesame seeds/Ellu – 1 cup
2.       Powdered Jaggery  - ½ cup
3.       Ghee – to grease

Method

1.       Dry roast the sesame seeds till light brown in color.
2.       Heat a kadai. Add the powdered jaggery and just enough water for the jaggery to dissolve, about ¼ to ½ cup.
3.       Let the jaggery dissolve completely. Strain for impurities and pour it back into the kadai.
4.       Let the jaggery boil on medium flame till soft ball consistency (Thakkali paagu) is reached.
5.       To test the syrup consistency, add a drop of the syrup into a bowl of water. Now gather that drop in the water with your fingers and try to roll into a ball. If you can make the ball then the right consistency has been achieved else let it boil for some more time. Keep checking every 2 to 3 minutes.
6.       Now add the roasted sesame seeds and mix well, until all the sesame seeds are coated with the jaggery syrup.
7.       Remove the above mixture into another plate.
8.       Now, grease your hands with a little ghee and start shaping them into balls.


That’s it, yummy and healthy laddoos are ready.


Check out the Blogging Marathon page for the other Blogging Marathoners doing BM#10

Also linking it to the Winter Carnival at Tickling Palates.

Tuesday, November 22, 2011

Carrot Coriander Soup


Before starting this post I want to congratulate Srivalli for the great success of this series: Blogging Marathon. The blogging marathon has reached its 10th edition and I am glad to be part of it once again. It has been quite a while since I took part, the last time was during BM: 5. Though I would love to be part of the marathon every month, but, since I am a full time mom of a really mischievous little girl, I have to restrict myself. I really enjoyed the last edition, and I am looking forward to a wonderful and exciting marathon this time too.

This time around I would be blogging under the theme winter specials, very apt for the season right! So friends, watch out my space for some piping hot, spicy and yummy winter specials.

Today’s recipe is an interesting combination of soup: carrots and coriander. Though I am not a soup person, but I do enjoy a few of them especially during the winters. This recipe has been adapted from Sanjeev Kapoor’s Cookbook. I have made a few changes to the original recipe to suit my needs. It is quite a filling soup and can work for a light meal. Here comes the recipe:


Serves – 2 to 3
What you’ll need

1.       Carrots – 7 to 8 medium sized
2.       Fresh Coriander Leaves – 1 medium bunch
3.       Bay Leaves – 1
4.       Peppercorns – 8 to 10
5.       White Pepper Powder – ½ tsp
6.       Sugar – a pinch
7.       Juice of half a lemon
8.       Salt – to taste

Method

1.       Peel, wash and roughly chop carrots. Clean wash and finely chop coriander leaves. Keep the stems for further use.
2.       Heat a pan, add the chopped carrots, bay leaves and peppercorns and the coriander stems. Also add enough water (about 3 cups of water) and bring to a boil.
3.       Cook till carrots are completely cooked. Let it cool.
4.       Remove the bay leaves and strain the carrots. Reserve stock. Puree the carrots with the coriander stem and pepper corns.
5.       Pour the puree into a pan add enough stock, adjust according to required consistency and boil for a 3 to 5 minutes.
6.       Season with salt and white pepper powder and a pinch of sugar. Stir in the chopped coriander leaves. Finally add a dash of lemon juice.

Enjoy it hot with an accompaniment of your choice.


Note:

You can sauté a medium sized onion and few pods of garlic in a little butter or olive oil before adding the carrots.


Check out the Blogging Marathon page for the other Blogging Marathoners doing BM#10

Linking this to the Winter Carnival at Radhika's space.

Sunday, November 20, 2011

Spicy Vazhakkai Curry


Raw bananas/plantains/vazhakkai/Kaccha Kela is a very versatile veggie. It can be used to make anything ranging from an appetizer, snack, gravies, dry curries etc. We generally use this veggie in molagootal, mulagushyam , mezhukkuperatti, puli kutthi upperi, thoran, kalan, mor Kootan etc.  But my favorite is this spicy curry which I learnt recently. This goes very well with plain rice and rasam and also with curd rice.  So let’s get to recipe without further ado.

Serves: 4
What you’ll need

1.       Raw Banana/Vazhakkai – 4 Medium
2.       Turmeric Powder – a pinch
3.       Salt to taste

Dry roast and grind

1.       Bengal Gram Dal/ Channa Dal – 2 tsps
2.       Urad Dal – 1 tsp
3.       Coriander Seeds – 1 tsp
4.       Red Chillies – 2 or 3
5.       Black Peppercorns – 5 or 6

For Tempering

1.       Coconut Oil/ Refined oil – 2 tbsp
2.       Mustard Seeds – 1 tsp
3.       Curry Leaves – few
4.       Hing – a pinch

Method

1.       Wash, peel and chop the raw bananas into small cubes. Keep them immersed in a mixture of water and buttermilk/ curd till further use. Wash again before use.
2.       Heat a kadai, dry roast channa dal, urad dal, coriander seeds, red chillies, and black pepper till good aroma comes out and the dals have turned a nice golden brown. Cool and grind to a fine powder.
3.       Heat the same Kadai, with oil. Temper with mustard seeds, curry leaves and a pinch of hing/asafetida.
4.       Now add the chopped raw banana cubes, turmeric powder and salt to taste. Stir well. Sprinkle little water, cover and cook in low heat till the vegetable is cooked. Keep stirring in between.
5.       Once vegetable is cooked, remove lid and let it roast for about 5 to 6 minutes on medium flame.
6.       Now add the spice powder and mix well. Remove from flame after a minute or two.
That’s it! Hot and tasty vazhakkai curry is ready. Serve it with some plain rice and rasam for a comforting and fulfilling meal.


Note:  
If you have a steamer, you could steam cook the raw banana pieces until done.
You could also add a little bit of tamarind paste for a slightly tangy taste, but I prefer it without it.

Linking this to Veggie/Fruit of the month - raw bananas hosted by Archana originally started by Priya
Also to Only Curries hosted by Kamalika started by Pari.
And to the Winter Carnival happening at Tickling Palates
And to the Kerala Kitchen hosted by Fajeeda.

Wednesday, November 16, 2011

My First Event Announcement


Hi Friends!

I am really happy to announce that Palakkad Chamayal will be guest hosting its first ever event - Herbs and Flowers started by PJ. I would like to thank PJ for giving me the opportunity to host this wonderful event. This month’s star ingredient is Spring Onion.

Spring onions, also known as scallions, green onions, salad onions, green shallots etc are milder than onions and can be cooked or eaten raw. Spring Onions have been used as an ingredient in various dishes for thousands of years by many cultures around the world. They are widely used in soups, salads, Chinese noodles, fried rice etc.

Spring onions are a very good source of vitamin C, chromium and dietary fiber. They are also a good source of manganese, molybdenum, vitamin B6, and folate, potassium, phosphorous and copper. It is effective against colds, headaches, chills to the stomach, indigestion, and also for insomnia.   
So friends, please extend your support to this wonderful event by cooking and posting a dish featuring spring onions.


Rules for the event
1.      Cook and blog about a Vegan or Vegetarian dish which features Spring Onion. Though this series is based on the culinary uses, you can also share the following -growing spring onion or tips on freezing or storing them ,non culinary uses that have been tried and tested by you like cosmetic uses, home remedies, crafts etc. You can also write about some interesting facts on Spring onion.
2.      Please add this announcement link, and link to PJ’sannouncement page to your post
3.      Adding the logo to your post will help spread the word.
4.      Send in as many entries as you wish. Archives entries are also accepted but do make a link to the post with both the announcements.
5.      The last date for the entries is December 15th 2011.
6.      Non bloggers are also welcome to participate
7.      Drop a mail to  kaverivenkatesh@gmail.com with these details
a.       Your name and name of your blog
b.      Recipe and URL:
c.       Picture of your dish {Please re-size your images}


Looking forward to see all your wonderful entries .......

Tuesday, November 15, 2011

Cheesy Corn Pasta


My daughter loves noodles and pasta. She would love to have it every other day. But I am really not in favor of the instant noodles that are available in the markets. But even then, I have to give in to my daughter’s demands (read - tantrums) many a times.

Though pastas have been available in the Indian markets since a very long time, I was introduced to this only very recently. But I never ventured into making it at home. Then one day, my daughter had this Maggi’s instant pasta and was addicted to it. That’s when I thought it’s high time for me to start experimenting with this ingredient. But the first few times I made, it was a failure, either the pasta would get overcooked or it would be only half cooked or sometimes the sauce would’nt be right. My daughter continued to like the Maggi instant pasta. That’s when I saw this recipe in Priya’s space, with whom I have been paired for this week’s blog hop. I decided to try it out and believe me; my daughter loved it and has asked me to make it again very soon. The pictures are terrible though, but you have to take my word on how delicious it was. I will soon update these pictures with better ones, since I will definitely have to make it again many more times for my daughter. Please find the original recipe here.

What you’ll need

1.       Pasta (any variety) – 2 cups
2.       Sweet corn nibbles – ½ cup or more (boiled)

For the sauce

1.       Garlic – I clove
2.       Butter – 2 tsp
3.       All purpose flour/ Maida – 1 tbsp
4.       Milk - 1 ½ cups
5.       Cheese – 2 small cubes (I used Amul cheese)
6.       Chilli Flakes – ½ tsp
7.       Oregano – a big pinch
8.       Pepper powder – ½ tsp
9.       Salt to taste


Method

1.       Cook the pasta as per the instruction on the packet. Drain and refresh with cold water, drain again and keep aside. Add the boiled sweet corn nibbles to it.

For the sauce

1.       Heat a non stick pan with butter, add crushed garlic and sauté.
2.       Next add maida and sauté for a few minutes or till the raw smell disappears.
3.       Now slowly add the milk while whisking continuously, so that no lumps are formed. Let this cook for about 2 to 3 minutes or till the sauce starts boiling.
4.       Next add in one cube of grated cheese and mix well. Now add the chilli flakes, oregano and pepper powder and salt to taste. Mix well.
5.       Now add the cooked pasta and corn. Mix well without breaking the pasta.
6.       Finally, before serving add another cube of grated cheese.
That’s yummy and delicious pasta is ready to dig in.

See my daughter enjoying her yummy pasta!


Note: Adjust seasoning according to taste.

Linking this to Radhika’s Blog Hop.
Related Posts Plugin for WordPress, Blogger...