Showing posts with label Blogging Marathon. Show all posts

Tuesday, November 29, 2011

Carrot Halwa | Gajar Ka Halwa


Here we are on the last day of the blogging marathon. I have been blogging under the theme “Winter Specials”. It was another fun experience. Thought of finishing off the marathon with a sweet note. So here is a classic winter special recipe: Gajar Ka Halwa.
This is a dish which my mom used to make every winter, especially when the Delhi Carrots start arriving in the markets. I too am following her footsteps and make this dish almost 3 to 4 times during these winter months. There are many variations to this simple recipe. Some people use the pressure cooker to cook the carrots, some make use of condensed milk for sweetening and a few others add khoya/khoa to give that extra richness. Here is my way of making this classic Indian dessert:


Makes 5 to 6 servings

What you’ll need

1. Grated Carrots – 5 Cups
2. Milk – 3 Cups
3. Sugar – 1 Cup to 1 ¼ cup
4. Cardamom – 4 to 5 crushed and powdered
5. Cashew Nuts – 6 to 7 broken
6. Raisins – 10 to 12
7. Ghee/Clarified Butter – 3 to 4 tbsp

Method

1. Heat a Kadai with 2 tbsp of ghee.
2. Add the grated carrots and sauté for a few minutes, on medium flame.
3. Now add the milk and allow to cook on medium flame, stirring once in a while till all the milk evaporates.
4. Keep stirring continuously once the milk has almost reduced else the carrots may stick to the bottom and burn.
5. Now add sugar and mix well. The carrot milk mixture will become liquid again.
6. Keep stirring continuously till the mixture starts thickening, add another tbsp of ghee and mix well.
7. Once the mixture is dry and starts leaving the sides, remove from flame.
8. Heat a small frying pan with a tbsp of ghee, fry cashews and raisins and add to the halwa.

That’s it tasty and yummy Gajar Ka Halwa is ready.


Check out the Blogging Marathon page for the other Blogging Marathoners doing BM#10

Linking this to the Winter Carnival happening at Tickling Palates.

Sunday, November 27, 2011

Gobi Manchurian


Here is yet another family favorite. This is one dish that I would’ve decided to order in the restaurant, even before leaving home. But when it comes to making this at home, I make it only once in a year, and that would be sometime during the winter months, when fresh white and dense gobis are available.

There is a small incident which comes to my mind whenever I make or have Manchurian. It was the time we were living in Bangalore, and had just moved to a new apartment. My SIL and her daughter who was just 10 months old had come over and since we had just shifted, the house was a big mess and the kitchen totally unsettled. So we decided to have lunch outside and as was the norm I ordered for Gobi Manchurian. My niece started getting restless; she wanted everything in her hands, from the glasses to the plates and spoons. Just to pacify her, my SIL gave her a small piece from the Manchurian, cos that was the only item that had arrived. The moment she finishes that piece, she asked for one more and then one more and ate almost 5 to 6 pieces of the 10 or 12 pieces. We were all so surprised as it was quite spicy and we had to literally stop her from eating.

This same girl when she was about 2 and ½ years old, came home one day and asked what’s cooking for breakfast. I said idly. So she said ok, I will have some then I asked if she would like to have some sugar or chutney with it. I was stunned by her answer, she asked if she could have either Aavakkaya or Molagapodi!! Now she is 8 years old and her taste buds have not changed one bit!

Now let me get to the recipe:

What you’ll need

1. Cauliflower/Gobi – 1 Medium
2. Oil for deep frying

For the batter:

1. Maida/All Purpose Flour – 4 tbsp
2. Cornflour – 4 tbsp
3. Rice flour – 2 tbsp
4. Pepper Powder – 1 tsp
5. Salt to taste

For the sauce

1. Garlic – 1 or 2 cloves
2. Ginger – 1 small piece
3. Green Chilly – 1 finely chopped
4. Spring onions – 4 to 5 heads
5. Capsicum – 1 small (optional)
6. Tomato Sauce – 1 tbsp
7. Soya Sauce – 2 tsps
8. Chilli Sauce – 1 tsp
9. Cornflour – 1 tbsp
10. Salt to taste
11. Oil – 1 tbsp

Method

1. Separate the cauliflower into bite sized florets.
2. Put them in salted boiling water for about 10 minutes. Drain and keep aside.

For the Manchurian

1. In a wide bowl, add the Maida, Cornflour, and rice flour and mix well.
2. Add salt and pepper powder and mix well.
3. Now add water and make into a batter of dropping consistency.
4. Heat oil for deep frying.
5. Drop the cauliflower florets into the batter and spoon them into the hot oil one by one. You can fry about 5 to 6 in a batch.
6. Cook on medium flame, till the outer batter is cooked and turns crispy. Drain on to a tissue and keep aside.

For the sauce:

1. Heat a Kadai with oil, add the green chillies, ginger and garlic and fry for a minute. Next add the spring onion whites and sauté.
2. Next add the chopped capsicum and fry for about 2 to 3 minutes on medium flame.
3. Now add the tomato sauce, soya sauce, chilli sauce and salt sauté well.
4. Dissolve the cornflour in ½ a cup of water and add it. Stir well, till you get a semi solid, shiny consistency.
5. Now add the fried cauliflower florets and mix well.
6. Finally garnish with the spring onion greens.

Yummy Gobi Manchurian is ready!


Check out the Blogging Marathon page for the other Blogging Marathoners doing BM#10

Linking this to PJ’s Event Herbs and Flowers – Spring Onions hosted by me.

Also to Winter Carnival happening at Tickling Palates.

And to Flavors of China hosted by Kalyani started by Nayna.

Saturday, November 26, 2011

Mooli Paratha


Mooli parathas are another of my favorite ones, after paneer and moong dal. Though moolis or radishes are available throughout the year in most places, but in winters you see loads and loads of fresh, white and tender moolis. The most common use of mooli in my household is in Sambar, hubby’s favorite. While I’m writing this post, mullangi sambar is simmering on the stove top . The other popular dish is mooli paratha. My daughter loves it and asks me to make for her lunch box whenever she sees that I have purchased mooli.

So today’s recipe is going to be my daughter’s mooli paratha:

Makes about 16 medium sized parathas

What you’ll need

For the stuffing

1. Radish/Mooli/Mullangi – 5 Medium sized
2. Green Chillies – 1 or 2 finely chopped
3. Chilly Powder – ½ tsp
4. Coriander Powder – 1 tsp
5. Garam Masala Powder – ½ tsp
6. Fresh Coriander Leaves – ½ bunch, finely chopped
7. Turmeric Powder – a pinch
8. Salt to taste
9. Cumin seeds
10. Oil – 2 tsps

For the dough

1. Wheat flour – 4 cups
2. Oil – 1 tbsp
3. Salt to taste
4. Water as required

Method

1. Make the dough as for rotis- make sure that the dough is not too hard nor sticky. It should be very pliable.

For the stuffing

2. Wash, peel and grate mooli in a fine grater. Squeeze out all the excess water from it and keep aside.
3. Heat a kadai with oil, add cumin seeds, once they change color, add finely chopped green chillies and fry.
4. Next add the squeezed mooli, turmeric powder, coriander powder, chilly powder and garam masala powder and salt to taste. Mix well. Cook for about 5 minutes, stirring at regular intervals, till you feel there is absolutely no moisture.
5. Finally add the coriander leaves and mix well. Transfer into a bowl and allow to cool completely.

For making the parathas

1. For making the parathas, pinch out a lemon sized ball from the dough, roll out into a small disc. Place a spoonful of filling in the middle and bring the edges together to completely cover the filling. The edges should overlap slightly to seal the masala. Gently flatten the filled ball. Dust with flour and roll out to a flat disc of about 5-6 inches.
2. Heat a tava (griddle). Roast the paratha on medium heat till done on both the sides. Grease the paratha with a little oil while cooking.


Yummy mooli parathas are ready. Serve with raita and pickle of your choice.

Check out the Blogging Marathon page for the other Blogging Marathoners doing BM#10

Also linking to Winter Carnival happening at Tickling Palates.

Friday, November 25, 2011

Methi Malai Matar (Without Malai)


With the onset of winter, markets are flooding with my favorite greens, Methi leaves or Fenugreek. I simply love the flavor and aroma that it imparts. These can be used to make theplas, pooris, curries etc.

Methi malai matar, is a rich, creamy and yummy accompaniment to rotis, parathas or naans. Tried this recipe for the first time during my college days in a restaurant and I was bowled over by its taste and especially the flavorful aroma. Since then I used to order it almost everytime I visited a restaurant. Then after marriage, I once saw this packet, with the label Methi Malai Matar and it immediately caught my attention. On going through the instructions at the back, came to know that this yummy curry could be made easily at home, by just adding chopped fenugreek and boiled fresh green peas to the contents of the packet. So immediately bought and made it the same day. But alas! the taste wasn’t anywhere near what I expected. So there went my attempt to have my favorite curry at home 

A few days later, I saw the recipe on a cookery show in T.V noted it down and made it with a few changes. The curry turned out to be a super hit. Since this curry is loaded with the richness of cream, I wanted to make it in such a way that it is tasty yet a little lower in calories and came upon this particular recipe which does not use cream at all. So here comes the recipe:

Serves: 4

What you’ll need

1. Fenugreek leaves – 3 to 4 cups
2. Fresh or Frozen Green Peas – 1 Cup
3. Onion – 3 Medium, finely chopped
4. Green Chilly – 1 or 2 slit
5. Garlic – 1 clove, finely chopped
6. Ginger – a small piece, grated
7. Cashew nuts – a fistful, (about 20 whole)
8. Milk – 2 cups
9. Cumin Seeds – 1 tsp
10. Oil – 1 tbsp
11. Butter – 1 tsp
12. Coriander powder – 1 tsp
13. Pepper Powder – ½ tsp
14. Garam Masala Powder – ½ tsp
15. Sugar a pinch
16. Salt to taste

Method

1. Soak the cashew nuts in hot water for about 5 to 10 minutes. Remove from water, pulse it for a minute so that the cashew nuts are powdered well. Now add about ¼th cup of milk and grind it into a smooth paste.
2. Boil the green peas in water and keep aside.
3. Wash the methi leaves well, and roughly chop it.
4. Heat a Kadai with oil and butter, add cumin seeds.
5. Now add chopped onions, fry till translucent. Next add in the finely chopped garlic, grated ginger and slit green chillies. Saute till the raw flavor disappears or till the onions start browning.
6. Now add the chopped fenugreek leaves and sauté till the leaves wilt, for about 3 to 4 minutes.
7. Next add the boiled peas, pepper powder, coriander powder and sauté for about 30 secs.
8. Pour in the ground cashew paste and stir well. Add salt to taste. Also add the remaining milk, sugar and garam masala. Let this simmer for a few minutes. Keep stirring once in a while else the gravy may burn.
9. Adjust consistency by adding little water or milk if required.


That’s it creamy and yummy curry is ready. Serve it with some hot rotis or parathas.

Check out the Blogging Marathon page for the other Blogging Marathoners doing BM#10

Also linking this to Winter Carnival at Tickling Palates and Only Curries hosted by Kamalika.

Thursday, November 24, 2011

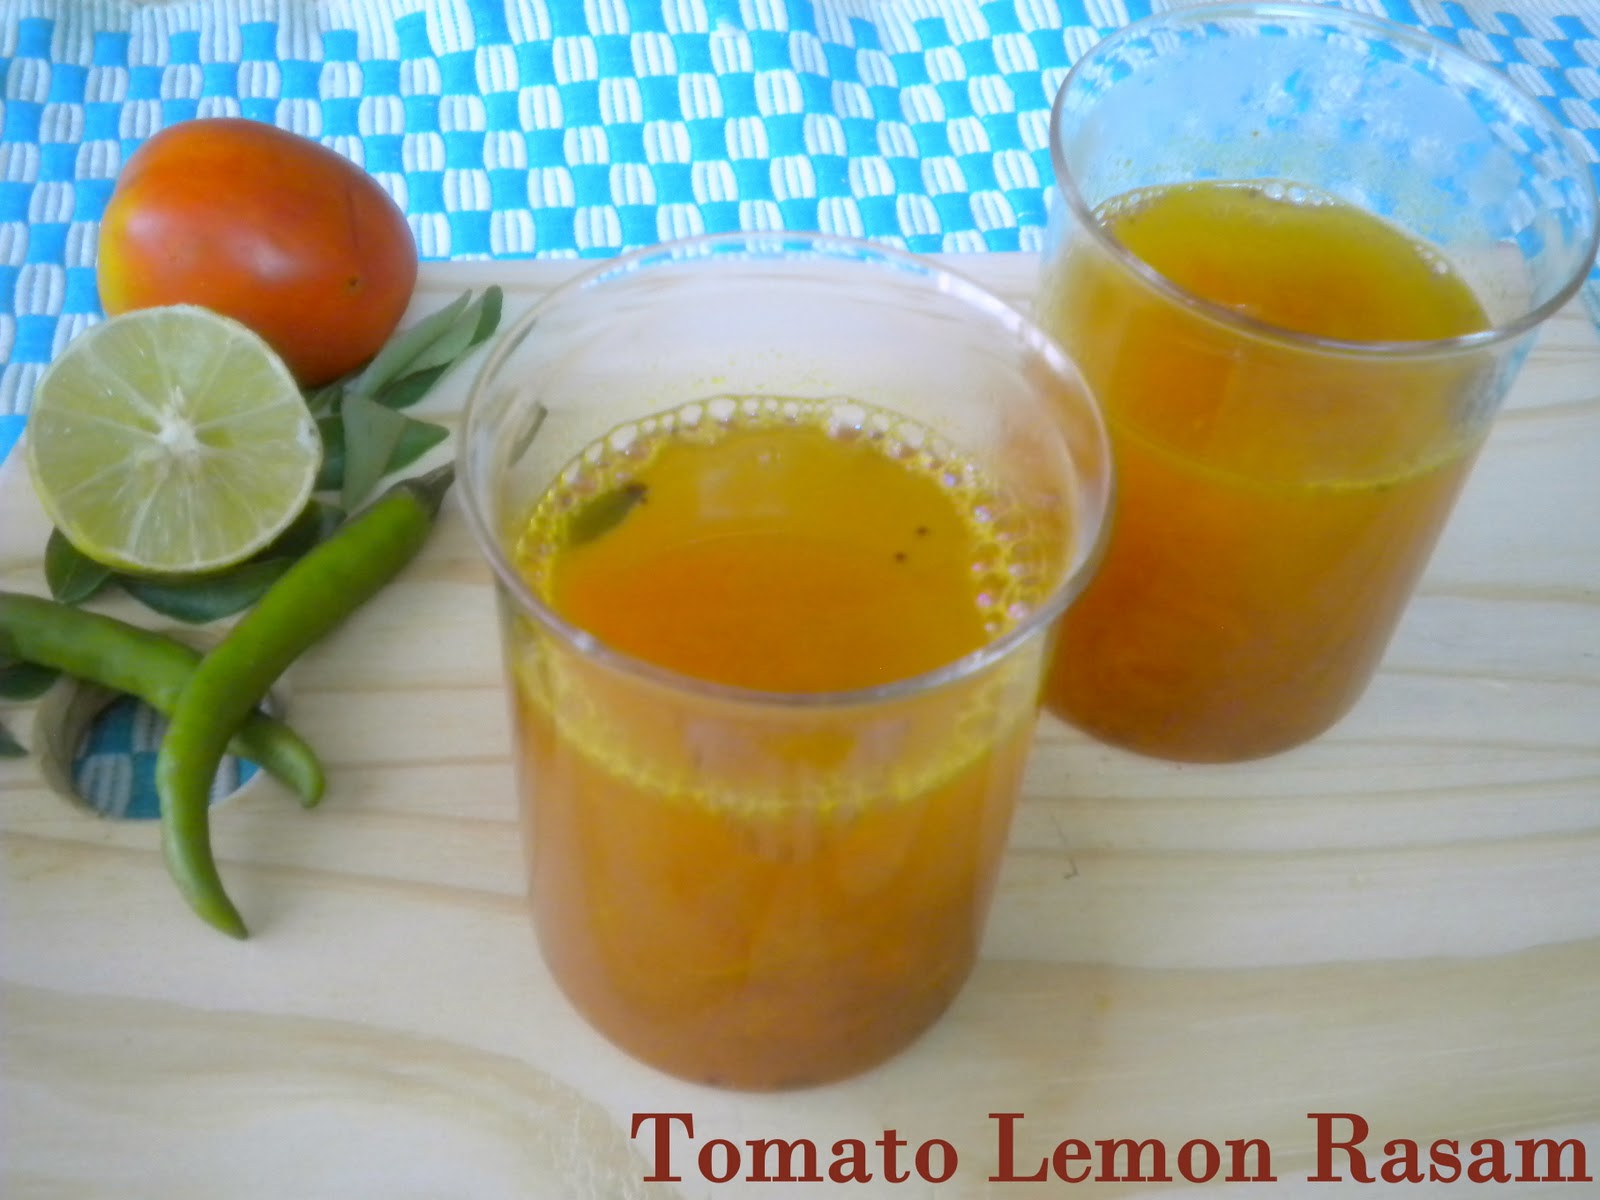
Tomato Lemon Rasam


Today’s recipe, Rasam is a popular south Indian dish. It is a must during any feast and is generally served as the second course with rice. Most of my North Indian friends, I have seen love to drink this in a glass or bowl like a soup. There are many different kinds of rasam the popular ones being Tomato Rasam, Lemon Rasam, Pepper Rasam, Jeera Rasam etc. So, whether you decide to drink a warm glass of this appetizing soup or have it with rice and spicy potato fry with sutta applam the choice is yours, it is just perfect for the wintery months.

I was always very apprehensive about posting a recipe for Rasam. It is indeed quite simple to make but I thought it would definitely benefit people like me.  If rasam was being made, I would generally escape from the kitchen giving some reason or the other. The reason being, though it is very easy to make, still it needs to be made perfectly with the perfect blend of its main ingredients tamarind and other spices. Initially when I used to prepare rasam, it would become either too sour, or it would be very watery or spicy something or the other would go wrong. Now, with lot of trials, I have kind of mastered it.

Before my marriage rasam to me, would mean only say two kinds, tomato rasam and Jeera Rasam. It was only after I got married and saw my MIL make a different one each day, that I realized Rasam could be made in so many different forms each one having its own unique trademark taste. Today’s recipe is one such, which I learnt from her, that she in turn learnt from her MIL. Whenever my MIL prepares this rasam she would always think of her MIL and say that this was her signature dish, now I feel this is my MIL’s signature dish. My younger one simply loves this and she enjoys having this as such in a glass and with everything like, idly, dosa and ofcourse rice!


What you’ll need

1.       Cooked and Mashed Toor dal – 1 tsp
2.       Tomatoes – 3 Medium sized, ripe ones
3.       Green chilly – 1 slit
4.       Ginger – a small piece, crushed
5.       Tamarind – marble sized ball
6.       Chilly powder – ½ tsp
7.       Turmeric Powder – a pinch
8.       Hing – a pinch
9.       Juice of half a lemon
10.   Fresh coriander leaves – few sprigs
11.   Curry Leaves - few

For tempering

1.       Ghee/clarified butter – 1 tsp
2.       Mustard Seeds -  ½ tsp
3.       Jeera/ Cumin seeds – 1 tsp

Method

1.       In a bowl, add roughly chopped tomatoes, slit green chilly, crushed ginger and tamarind. Add enough water.
2.       Let this boil till the tomatoes are soft say about 8 to 10 minutes.
3.       Remove from heat and let it cool completely.
4.       Now mash and squeeze the tomato tamarind mixture and remove the peel, green chilly and the tamarind residue.
5.       Pour this liquor in another vessel, add turmeric powder, chilly powder, hing and salt to taste. Add a few torn curry leaves. Allow to boil for few minutes say about 5 to 6 minutes. Always boil rasam on medium flame else it will bubble up and overflow.
6.       Now, mix the mashed dal with about 1 to 1 ½ cups of water and add it to the boiling rasam. After adding this, rasam should not boil, so keep the flame on low heat and switch off once it starts foaming up. (Adjust water according to sourness of rasam, add more if required) Garnish with coriander leaves.
7.       Heat a small frying pan with ghee, season with mustard and jeera and pour it over the rasam.
8.       Add the lemon juice and mix well. Rest the rasam at least for 5 minutes so that the flavours are well blended.


Enjoy this heartwarming and comforting rasam as it is or with rice and papad.

Check out the Blogging Marathon page for the other Blogging Marathoners doing BM#10

Linking this to the Winter carnival happening at Tickling Palates.

Wednesday, November 23, 2011

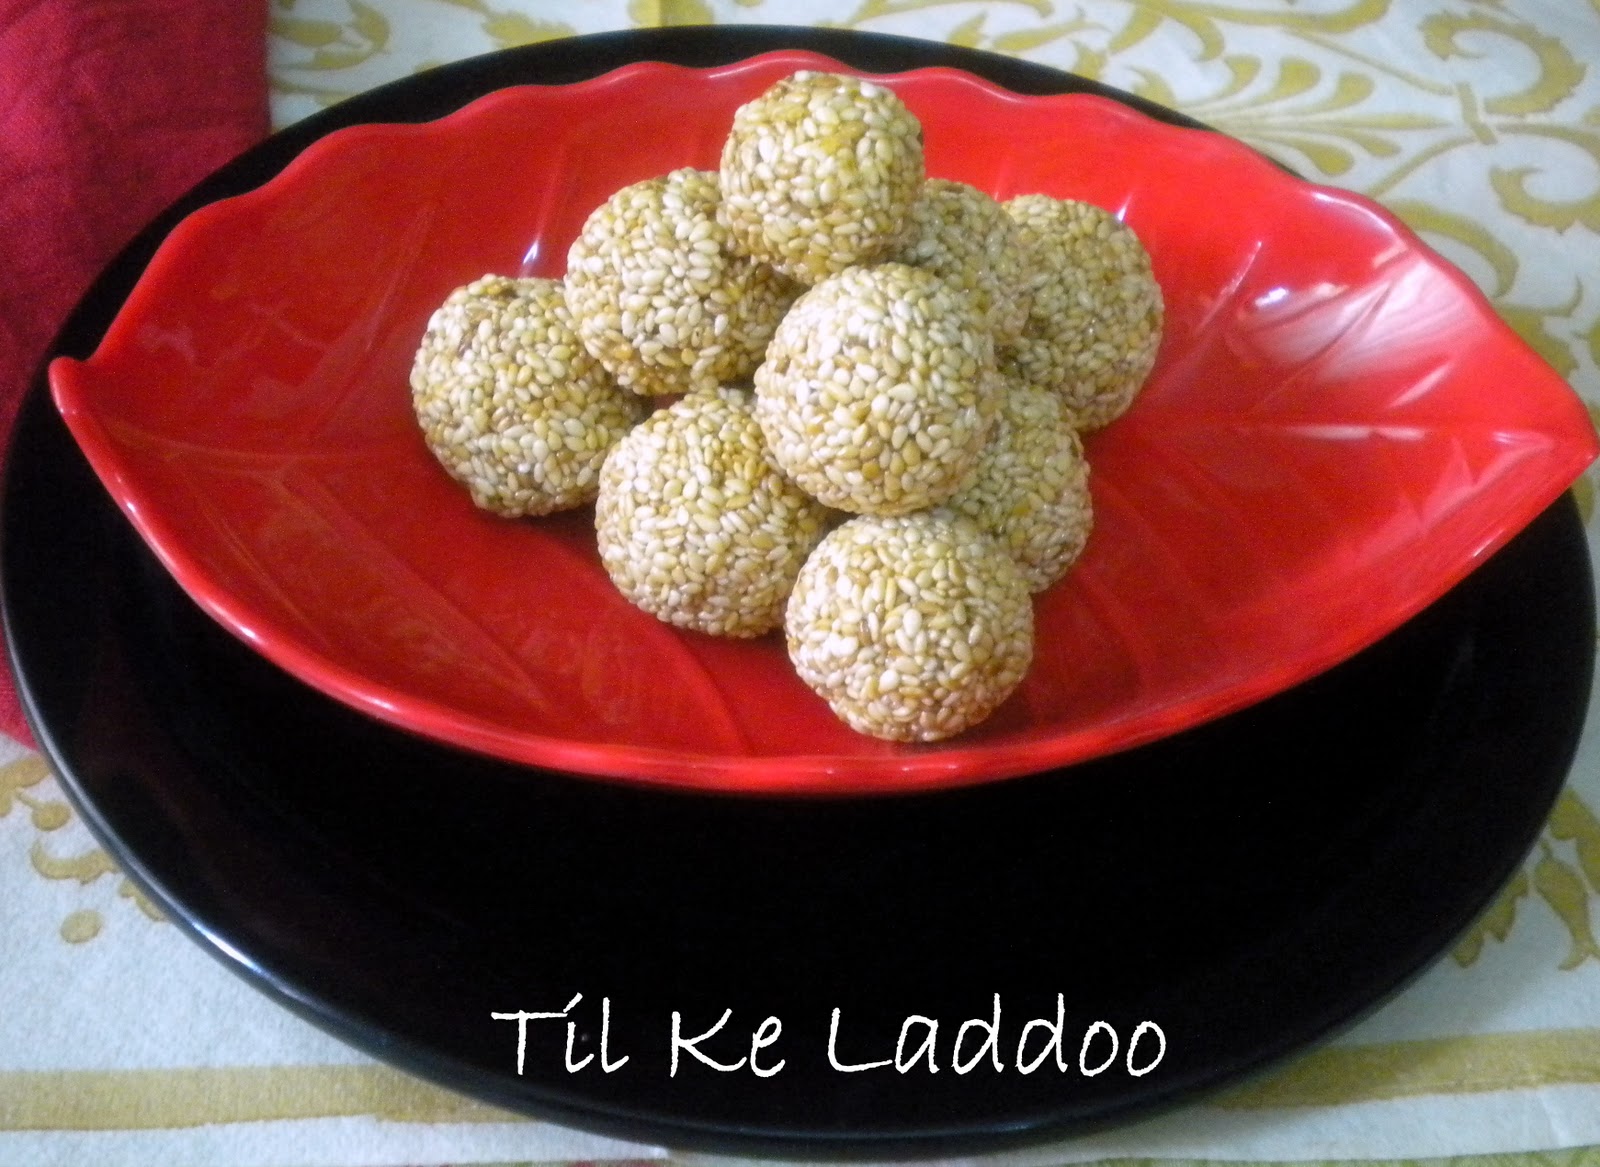
Til Ke Laddoo/Ellu Urundai


Having lived in Chennai for most of my life, I never knew what winter was like. Then one fine day, my father got transferred to a place called Ghaziabad near Delhi. I and my brother were very excited to be going to some city in the Northern part of India. We lived there for around 3 years and it was during this time that I actually came to know how it feels in winters.

I used to always envy my cousins living in Delhi for their winter uniforms: Smart woollen skirts or tunics with belt and tie, Sweaters and the best part blazers. So finally, I got to wear the the blazer. We used to leave home by about 6: 45 am and at that time, it would be quite dark outside, freezing and so much of mist and fog. On certain mornings we just did not feel like getting out of the warmth of our cosy razai. But still I love it rather than the sweltering heat. By around 5 pm it would start getting dark, the days were too short and nights very long. I long for those wintry nights. 

Come winter, and you could see loads and loads of the freshes vegetables like the Red Carrots, Raddishes, Turnips, Cauliflowers, Green Peas, Methi Leaves, Spinach etc. It was a norm in most houses to cook with these seasonal veggies. Dishes like Mooli Ka Paratha, Gobhi Ka Paratha, Gajar Ka Halwar, Makki ki Roti/ Sarson Ka Saag (recipes will follow) are few of the most common recipes that were dished out. My mom learnt a lot of recipes there, which we still continue to make.

Basically, winters are times when one loves to relax, laze around, enjoy a hearty meal and have a good night’s sleep. So this is exactly what I and my brother did when we lived Ghaziabad. 

Til ka Laddoo is a popular sweet in North India, generally made during winters especially for Sankranthi. Til and jaggery are said to keep the body warm from within. During winters, the markets in North India are flooded with different varieties of sweets made out of til like Gajak, revadi, etc. These healthy laddoos can be enjoyed as a dessert or as a healthy snack. So here is a simple recipe to keep you warm this winter:


What you’ll need

1.       White Til/Sesame seeds/Ellu – 1 cup
2.       Powdered Jaggery  - ½ cup
3.       Ghee – to grease

Method

1.       Dry roast the sesame seeds till light brown in color.
2.       Heat a kadai. Add the powdered jaggery and just enough water for the jaggery to dissolve, about ¼ to ½ cup.
3.       Let the jaggery dissolve completely. Strain for impurities and pour it back into the kadai.
4.       Let the jaggery boil on medium flame till soft ball consistency (Thakkali paagu) is reached.
5.       To test the syrup consistency, add a drop of the syrup into a bowl of water. Now gather that drop in the water with your fingers and try to roll into a ball. If you can make the ball then the right consistency has been achieved else let it boil for some more time. Keep checking every 2 to 3 minutes.
6.       Now add the roasted sesame seeds and mix well, until all the sesame seeds are coated with the jaggery syrup.
7.       Remove the above mixture into another plate.
8.       Now, grease your hands with a little ghee and start shaping them into balls.


That’s it, yummy and healthy laddoos are ready.


Check out the Blogging Marathon page for the other Blogging Marathoners doing BM#10

Also linking it to the Winter Carnival at Tickling Palates.

Tuesday, November 22, 2011

Carrot Coriander Soup


Before starting this post I want to congratulate Srivalli for the great success of this series: Blogging Marathon. The blogging marathon has reached its 10th edition and I am glad to be part of it once again. It has been quite a while since I took part, the last time was during BM: 5. Though I would love to be part of the marathon every month, but, since I am a full time mom of a really mischievous little girl, I have to restrict myself. I really enjoyed the last edition, and I am looking forward to a wonderful and exciting marathon this time too.

This time around I would be blogging under the theme winter specials, very apt for the season right! So friends, watch out my space for some piping hot, spicy and yummy winter specials.

Today’s recipe is an interesting combination of soup: carrots and coriander. Though I am not a soup person, but I do enjoy a few of them especially during the winters. This recipe has been adapted from Sanjeev Kapoor’s Cookbook. I have made a few changes to the original recipe to suit my needs. It is quite a filling soup and can work for a light meal. Here comes the recipe:


Serves – 2 to 3
What you’ll need

1.       Carrots – 7 to 8 medium sized
2.       Fresh Coriander Leaves – 1 medium bunch
3.       Bay Leaves – 1
4.       Peppercorns – 8 to 10
5.       White Pepper Powder – ½ tsp
6.       Sugar – a pinch
7.       Juice of half a lemon
8.       Salt – to taste

Method

1.       Peel, wash and roughly chop carrots. Clean wash and finely chop coriander leaves. Keep the stems for further use.
2.       Heat a pan, add the chopped carrots, bay leaves and peppercorns and the coriander stems. Also add enough water (about 3 cups of water) and bring to a boil.
3.       Cook till carrots are completely cooked. Let it cool.
4.       Remove the bay leaves and strain the carrots. Reserve stock. Puree the carrots with the coriander stem and pepper corns.
5.       Pour the puree into a pan add enough stock, adjust according to required consistency and boil for a 3 to 5 minutes.
6.       Season with salt and white pepper powder and a pinch of sugar. Stir in the chopped coriander leaves. Finally add a dash of lemon juice.

Enjoy it hot with an accompaniment of your choice.


Note:

You can sauté a medium sized onion and few pods of garlic in a little butter or olive oil before adding the carrots.


Check out the Blogging Marathon page for the other Blogging Marathoners doing BM#10

Linking this to the Winter Carnival at Radhika's space.

Saturday, May 28, 2011

Pachha Papaya Thoran/Raw Papaya Stir Fry

Coconut trees, Jackfruit trees, Banana trees, Papaya trees are a common sight in most Kerala houses. The fruits of these trees are a major part of the Kerala cuisine. Extensive use of coconuts in all Kerala dishes is known to most of us. Papaya fruits also find their way in their daily cooking. Raw Papayas are used to make many dishes like Olan, Kootu, Molaguttal, Pachadi etc.
Today‘s post is on Raw Papaya Thoran. I have never seen my mom or grandma prepare this at home. Though we are from Kerala we never lived in Kerala as such. It was during my hostel days in Cochin that I first tasted this thoran. I took an immediate liking to it. It became one of my favorite items that was prepared in the hostel canteen and I used to eagerly wait for it. And now, whenever I find raw papayas in the stores, I pick them up to prepare this yummy stir fry which gets ready in about 20 minutes time. It goes very well with White rice and Sambar or even a simple tomato rasam.


What you’ll need (Serves -2)

1. Raw Papaya – 1 medium sized
2. Turmeric Powder – ¼ tsp
3. Salt to taste

For Seasoning

1. Coconut oil – 2 tsps
2. Mustard seeds – ½ tsp
3. Split urad dal – 1 tsp
4. Curry leaves – a few

To Grind

1. Fresh grated coconut – 1/3 cup
2. Green Chillies – 2
3. Cumin seeds – ½ tsp

Method

Wash, peel and chop papaya into small cubes. Heat a Kadai with coconut oil. Add mustard seed, once the splutter, add urad dal. As the dal changes color, add curry leaves, and papaya pieces. Stir well. Next add turmeric powder, salt and ½ a cup of water. Mix well. Cook covered till papayas get done. If there is water remaining after the pieces are cooked, keep stirring without lid on medium flame till water evaporates. In the meanwhile, grind all the items mentioned under To Grind list, without adding water. After the papaya pieces are cooked and all the water has evaporated, add the ground coconut mixture. Stir well.
Delicious Papaya Thoran is ready.


Note:

1. While selecting the papayas, choose one which just starting to ripen. This will lend a mild sweet taste to the curry. If not, then add about ½ tsp of jaggery. (I got only very raw ones, so added a little jaggery)
2. You can grate the papayas for faster cooking.

Check out the Blogging Marathoners doing BM#5 along with me 

Curry in a hurry under 30 min: Aarthi, Divya, Jayashree, Kaveri, Pavani,
Seven Days of Indian Sweets:Gayathri, Priya Suresh,
Seven Days of Microwave Meals: Monika,
Seven Days of Regional Specials:Harini, Vaishali, Suma, PJ
Seven Days of Colorful Dishes Kid's Special: Kalyani
Summer Coolers: Jayasree, Kamalika, Srivalli

Thursday, May 26, 2011

Palak Babycorn Masala

When I was newly married, we used to live in a place called Domlur in Bangalore and from that house Shanthi Sagar was just about 5 minutes walk. So whenever I used to feel lazy to cook or just was not in mood to go into the kitchen, we would head straight to our favorite haunt - Shanthi Sagar. You guys must be wondering as to what all this has got to do with today’s post. I tasted this curry for the first time here. I was very intrigued by the name, “Palak Babycorn Masala” – nothing intriguing in the name, but you know, in those days, I cooked only some regular daily fare, that too with the help of my diary. Then, the name Babycorn itself sounded exotic, different from the regular Paneer Butter Masala, Malai Kofta etc that’s how I gave it a try. Loved the taste and in due course of time recreated it at home. So here is the recipe:


(Serves 4)

What you’ll need:

1. Spinach or Palak – 2 big bunches
2. Babycorn – 1 packet
3. Onions – 2 big, finely chopped
4. Tomatoes – 3, finely chopped
5. Green Chillies – 3 to 4
6. Jeera – 1 tsp
7. Coriander Powder – 1 tsp
8. Garam Masala – ½ tsp
9. Oil – 2 tsps

Method

Clean and chop palak roughly. Cook the chopped palak, cool and grind it. Cut babycorn into round slices.
Heat a Kadai with oil. Add jeera. Once it changes color, add slit green chillies and chopped onions. Saute for a few minutes. Next add the babycorn pieces. Cook covered for a few minutes or till babycorn is done. Now add the coriander powder and garam masala. Saute for a minute. Next add the chopped tomatoes and sauté till they turn mushy. Then, add the ground palak paste and salt to taste. Let it simmer for a few minutes. (Do not cover and cook as Palak will change color).

Delicious Palak Babycorn Masala is ready to be served with some hot rotis.


Note:

1. This is a semi dry gravy, if you want it to be a gravy like add about ½ cup of water after adding the palak puree.
2. The spiciness of the dish is from green chillies only, so adjust spice according to your taste. The one I tasted at the restaurant was quite spicy.


Check out the Blogging Marathoners doing BM#5 along with me 

Curry in a hurry under 30 min: Aarthi, Divya, Jayashree, Kaveri, Pavani,
Seven Days of Indian Sweets:Gayathri, Priya Suresh,
Seven Days of Microwave Meals: Monika,
Seven Days of Regional Specials:Harini, Vaishali, Suma, PJ
Seven Days of Colorful Dishes Kid's Special: Kalyani
Summer Coolers: Jayasree, Kamalika, Srivalli

Also linking this to Veggie/Fruit of the month - Spinach hosted by Reshmi started by Priya.

Wednesday, May 25, 2011

Podalangai/Snake Gourd Poricha Kootu

Whenever I want to cook a quick meal I opt for the pressure cooking method, which not only saves time, but preserves nutrients and helps in using minimum oil.
As a child I never liked kootu, but over the years my taste buds have changed and now I love these simple and comforting dishes. Thankfully, my daughter likes molagootal and kootu very much. Both are quite similar, Molagootal is mixed with rice and eaten (like Sambar) whereas kootu is thicker and is made as an accompaniment to Sambar, Rasam or Mor Kootan. We have it even with rotis and it tastes very good.
Poricha kootu is a typical Tamil recipe. It is slightly different from the regular kootu in its ground spices. I learnt this from a Tanjore Aunty who was our neighbor in Chennai. This is a very simple and wholesome dish from which you can obtain the day’s requirement of proteins.


What you’ll need:

1. Sanke gourd or Podalangai – 3 cups (cut into small pieces)
2. Yellow Moong Dal – 3 tblsps
3. Channa Dal – 1 tblsp
4. Turmeric Powder – ¼ tsp
5. Salt to taste

To grind

1. Urad Dal – 1 tsp
2. Red Chillies – 1
3. Black Peppercorns – 5 – 6
4. Green Chillies – 1 or 2
5. Cumin Seeds – 1 tsp
6. Fresh Grated Coconut – ½ cup

For Seasoning

1. Coconut oil – 1 tsp
2. Mustard Seeds – ½ tsp
3. Split Urad Dal – ½ tsp
4. Hing – 1 pinch
5. Curry leaves a few

Method

Pressure cook the dals and snake gourd pieces with a pinch of turmeric powder. In the meanwhile, heat a small frying pan with very little oil, fry the items 1 to 3 mentioned under to grind till dal changes color. Let it cool. Now grind it with all the other ingredients mentioned under To grind, adding little water as and when needed.
Now, transfer the cooked dal and snake gourd pieces in a vessel. Add salt and let it boil for 2 to 3 minutes. Now add the ground paste and let it simmer for few minutes or till the kootu thickens.
Remove from heat. Heat a small frying pan with a tsp of coconut oil. Add mustard seeds, once they crackle, add urad dal, as it changes color add hing and curry leaves. Pour this onto the porichha kootu.
Tasty Poricha kootu is ready to be relished with white rice and rasam.


Notes:

1. You could add a piece of Drumstick to this kootu which gives a very good flavor.
2. Cook Dals and vegetables in different containers.
3. Do not add water while cooking the snake gourd as it gives out lot of water.
4. If there is lot of water after the vegetable is cooked, allow it boil for a longer time, before adding the ground paste.
5. Adjust spice according to your taste.

Check out the Blogging Marathoners doing BM#5 along with me 

Curry in a hurry under 30 min: Aarthi, Divya, Jayashree, Kaveri, Pavani,
Seven Days of Indian Sweets:Gayathri, Priya Suresh,
Seven Days of Microwave Meals: Monika,
Seven Days of Regional Specials:Harini, Vaishali, Suma, PJ
Seven Days of Colorful Dishes Kid's Special: Kalyani
Summer Coolers: Jayasree, Kamalika, Srivalli

Tuesday, May 24, 2011

Corn Capsicum and Paneer Masala

This is my first marathon and I am thoroughly enjoying it. We are into the 3rd day of the blogging marathon and I am posting under the theme Currys in a Hurry. Here is my post for Day 3.

Every day, I have to prepare some curry for my husband’s lunch box. And he generally likes his curry to have some gravy or at least semi gravy. As I prepare the same thing for my daughter’s lunch box also, I try to incorporate veggies which my daughter likes – else the box will come back untouched. Since my daughter loves paneer and sweet corn, I make this dish quite often. It is a simple and healthy curry which goes very well with rotis and parathas. Let’s get to the recipe:


Serves 2 - 3

What you’ll need:

1. Boiled Sweet Corn Kernels – 1 Cup
2. Paneer – 150 gms, cubed
3. Capsicum – 1 big, chopped into small pieces
4. Onion – 2 medium, finely chopped
5. Tomato Puree – ½ cup
6. Ginger Garlic paste – ½ tsp
7. Cumin Seeds – 1 tsp
8. Turmeric Powder – ¼ tsp
9. Coriander Powder – 1 tsp
10. Chilly Powder – 1 tsp (adjust according to taste)
11. Garam Masala Powder – ½ tsp
12. Kasoori Methi – 1 tblsp
13. Salt to taste
14. Sugar – ½ tsp
15. Oil – 2 tsps

Method

Heat a Kadai with oil, add the cumin seeds. Once they change color add the chopped onions and sauté for 2 minutes. Next add the ginger garlic paste and sauté till the onions turn translucent. Add in the chopped capsicum and sauté for a few minutes. Next add the spice powders – Turmeric, Chilly and Coriander Powder, Saute for a min. (If you feel that the mixture is sticking to the bottom add a spoon or two of water). Next put it in the tomato puree and sauté till the mixture comes together. Now, add the boiled sweet corn and paneer cubes. Add salt, sugar, and garam masala. Stir well. Add about ½ cup of water and kasoori methi. Cover and simmer for a few minutes.


Enjoy this yummy curry with hot phulkas or parathas.

Check out the Blogging Marathoners doing BM#5 along with me 

Curry in a hurry under 30 min: Aarthi, Divya, Jayashree, Kaveri, Pavani,
Seven Days of Indian Sweets:Gayathri, Priya Suresh,
Seven Days of Microwave Meals: Monika,
Seven Days of Regional Specials:Harini, Vaishali, Suma
Seven Days of Colorful Dishes Kid's Special: Kalyani
Summer Coolers: Jayasree, Kamalika, Srivalli

Monday, May 23, 2011

Vanni

Vanni is a not so common but very authentic and traditional Palakkad Iyer recipe. My grandmother used to prepare this as an accompaniment with Muthira Puzhukku and Kanji. It is a close cousin of the Mor Kuzhambu. A simple and healthy combination of Naadan Veggies like Ash Gourd, Pumpkin, Raw Bananas, and Yam simmered in mildly spiced thin yogurt gravy. Serve this with steamed white rice and spicy potato stir fry. So here is the recipe for Day 2 of the Blogging Marathon-


What you’ll need Serves – 4

1. Ash gourd – 100 gms
2. Yellow Pumpkin – 100 gms
3. Raw Banana – 1 small
4. Yam – 100 gms
5. Sour curds – 2 cups
6. Green Chillies – 2 to 3
7. Black Pepper Powder – ½ tsp
8. Turmeric Powder – ¼ tsp
9. Curry Leaves a few
10. Coconut Oil – 2 tsps
11. Salt to taste

Method

Wash and chop the vegetables into 1 inch size cubes. Add about ½ cup of water to the veggies and pressure cook them with slit green chillies, turmeric powder and pepper powder. Keep aside. Once the pressure is released, transfer the cooked vegetables into a vessel, add salt to taste and allow to boil for about 3 to 4 minutes. Whisk the curds well, lower the flame and add the curds to the vegetables. Simmer till the curry froths up. (The curry should not boil after adding the curds.) Turn off the flame. Drizzle coconut oil and add a few curry leaves.


Serve it warm with steamed rice and a stir fry of your choice.

Now let's check out my fellow marathoners in BM #5 and see what they are cooking today  

Curry in a hurry under 30 min: Aarthi, Divya, Jayashree, Jayasree, Kaveri, Pavani,
Seven Days of Indian Sweets:Gayathri, Priya Suresh,
Seven Days of Microwave Meals: Monika,
Seven Days of Regional Specials: Cool Lassi(e), Harini, Vaishali, Suma
Seven Days of Colorful Dishes Kid's Special: Kalyani
Summer Coolers: Kamalika, Srivalli

Sunday, May 22, 2011

Vegetable Saagu

I started my career in Bangalore as a computer teacher in a small school. I worked there for one academic year. I learnt many things during the course of the year. Once we had a teacher’s get together, and all the teachers had made some dish and brought it to school. They were all Karnataka specials like Madhur vade, bisi bele bath, avrekaayi playa etc. One of the teachers had got Chapathi and to go with it another had brought saagu. When I tasted the saagu I took an instant liking to it. Just loved it. Since then I have tried saagu in many restaurants, though all taste good but first taste is always special isn’t it. I immediately went to the teacher who had prepared it and got the recipe from her in a sheet of paper. I still have that sheet with me as her remembrance, though I know the recipe by heart. I tried it out the next day itself and everybody at home just loved it since it was new to them as well. From then on I have prepared this recipe umpteen number of times and we never get bored of it.

So I decided to start my blogging marathon under the theme curry under 30 mins with my favorite side dish Saagu which gets ready in about 20 minutes. Saagu is a side dish famous in Karnataka, served in almost all restaurants as an accompaniment to Poori, Set Dosa, Rava Idli etc. But it tastes equally good with chapathi. It is a medley of vegetables flavored with mild spices and coconut. So here comes the recipe:

What you need: (Serves 4)

1. Mixed Veggies – 2 cups (Chow Chow, potatoes, carrots, beans, green peas)
2. Salt to taste

For the Masala

1. Grated coconut – ½ cup
2. Roasted Channa Dal/ Pottu Kadali – 1 tbsp
3. Green Chillies – 2
4. Black pepper – 5 to 6
5. Coriander Seeds – 2 tsps
6. Cumin Seeds – 1 tsp
7. Green Caradamom – 2
8. Cloves – 2
9. Cinnamon – 1 small piece

For tempering

1. Mustard seeds – ½ tsp
2. Hing – a pinch
3. Curry Leaves a few
4. Oil – 1 tsp

Method:

Chop all the veggies into small cubes. Pressure cook the veggies and keep aside. In a small frying pan, dry roast coriander seeds, jeera, black pepper, cardamom, cloves and cinnamon till a nice aroma comes out.
Allow to cool. Grind these with roasted channa dal, coconut and green chillies into a fine paste adding little water.
Now, remove the veggies from the cooker, add salt to taste and let it boil for a few minutes. Next add the ground paste and mix well. Let it simmer for about 3 to 4 minutes.
Heat a small frying pan with a tsp of oil, add mustard seeds. Once they splutter, add the hing and curry leaves. Pour this tempering over the saagu.
Delicious Saagu is ready. Serve it with poori, chapathi or set dosai.


Note:

1. Do not add too much of whole spices as the garam masala taste will dominate and saagu won’t taste good.
2. Add pepper according to your taste, this curry is generally not too spicy.


Now let's check out my fellow marathoners in BM

#5
and see what they are cooking today  

Curry in a hurry under 30 min:
Aarthi, Divya, Jayashree, Jayasree, Kaveri, Pavani,

Seven Days of Indian Sweets:
Gayathri, Priya Suresh,
Seven Days of Microwave Meals: Monika,
Seven Days of Regional Specials: Cool Lassi(e), Harini, Vaishali, Suma

Seven Days of Colorful Dishes Kid's Special: Kalyani

Summer Coolers: Kamalika, Srivalli
Related Posts Plugin for WordPress, Blogger...